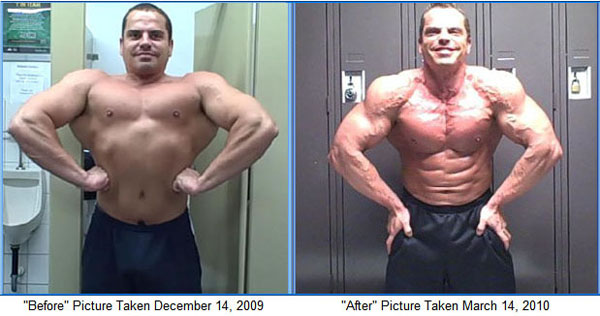
To take effective before and after photos in bodybuilding, ensure consistent lighting and use the same camera angles. Wear similar clothing to highlight changes.
Documenting your bodybuilding progress with before and after photos helps track changes and keeps you motivated. Consistency in lighting, camera angles, and attire is crucial for accurate comparison. Good photos can highlight muscle growth, fat loss, and overall transformation. Use a neutral background, maintain the same pose, and take photos at the same time of day.
This method provides a clear visual record of your hard work and progress. Properly taken photos can serve as a powerful tool to evaluate your fitness journey, celebrate achievements, and identify areas for improvement.
Using a high-quality camera makes a big difference. Smartphones with excellent cameras can work well. DSLR cameras offer more control and better quality. Mirrorless cameras are also a good choice. These cameras are lighter and easier to handle. Try to use a tripod for stability. A steady camera means clearer photos. Consistent angles are important for comparing photos.
Natural light is the best option. Shoot your photos near a window for even lighting. Avoid harsh sunlight that creates shadows. Soft light makes your muscles look defined. Artificial lights can help too. Use ring lights or softboxes for even lighting. Position lights at 45-degree angles for the best effect. Good lighting highlights your progress effectively.
Credit: leehayward.com
Setting Up Your Space
Capture impressive bodybuilding progress by setting up your space for before and after photos. Ensure consistent lighting and background to highlight changes. Position yourself in the same spot for each shot.
Background Choices
Choose a simple and plain background. A white or light-colored wall works best. Avoid backgrounds with patterns or clutter. This keeps the focus on your body changes. A clean background makes your photos look professional.
Consistent Environment
Consistency is key for accurate comparisons. Always take photos in the same place. Use the same lighting each time. Natural light is ideal. Stand at the same distance from the camera. Wear similar clothing for each photo session.
Perfecting Your Poses
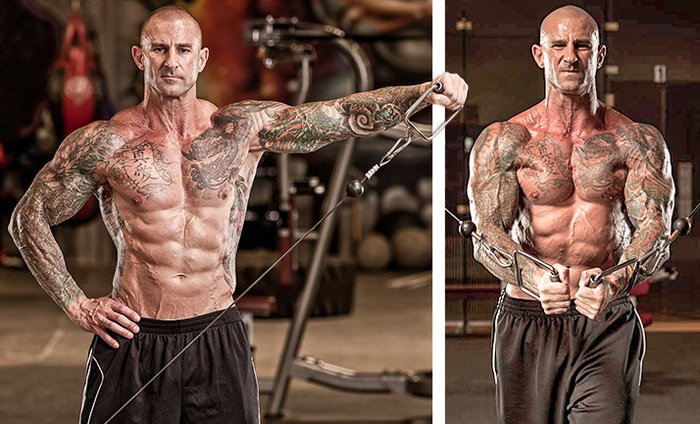
How to Take Before And After Photos Bodybuilding
Stand straight and face the camera. Flex your muscles. Show your biceps and abs. Keep your shoulders back. Your feet should be together. Smile to look confident. Good lighting helps show details. Take photos from eye level.
Turn your body sideways. Flex your triceps and legs. Keep your back straight. Look ahead for a strong pose. Show your profile clearly. Use a plain background. Highlight muscle definition. Angle your body to catch the light.
Face away from the camera. Flex your back and legs. Show your lats and traps. Keep your feet shoulder-width apart. Hold your arms slightly out. Ensure good lighting on your back. Keep your posture straight. Highlight muscle symmetry.
Timing Your Photos
How to Take before And After Photos Bodybuilding
Early morning light is soft and flattering. Midday sun can create harsh shadows. Late afternoon light is warm and golden. Choose the time that suits your preference. Consistency is key for accurate comparisons.
Take photos every two weeks. This captures gradual changes. Weekly photos might show minor differences. Monthly photos can miss small progress. Track your progress with regular intervals.
Maintaining Consistency
How to Take before And After Photos Bodybuilding
Wear the same clothes for each photo. Pick tight clothing to show muscle definition. Avoid loose clothes as they hide progress. Dark colors are better for contrast. Bright lighting can help show details. Always choose a simple background.
Stand in the same spot each time. Keep your posture straight. Hands should be at your sides. Feet should be shoulder-width apart. Use a mirror to check your pose. Take multiple angles: front, side, and back.
Using Proper Angles
Capture the best bodybuilding progress by using proper angles in your before and after photos. Highlight muscle definition and symmetry by adjusting camera height and distance.
Camera Angles
Choose the right camera angle for your photos. Position the camera at eye level. This helps in capturing a balanced look. Avoid using angles that distort the body. Keep the camera at a consistent height for all shots. This ensures accurate comparison. Natural light is best for clear photos.
Body Angles
Stand straight with good posture. Face the camera directly. Turn slightly to show different muscle groups. Flex muscles to highlight definition. Keep arms and legs relaxed but not limp. Ensure that your body is fully visible in the frame. Consistency is key for true comparison. Repeat the same poses for all photos.
Editing And Enhancing
How to Take Before And After Photos Bodybuilding
Start with basic edits like cropping and adjusting brightness. Make sure to keep the focus on the body. Use contrast to highlight muscle definition. Adjust the white balance for natural colors. Keep the background simple and clean.
Over-editing can make photos look fake. Avoid using too many filters. Keep the edits subtle to maintain realism. Over-sharpening can distort the image. Stick to natural enhancements. Do not alter the body shape or muscle size.
Credit: www.bodybuilding.com
Tracking Your Progress
Organizing your photos is very important. Keep them in one folder. Name each photo with the date. This helps you see the changes over time. Use good lighting for all photos. Wear the same clothes in each photo. This shows true progress. Take photos from the same angles. Front, side, and back views work best. Always take your photos at the same time of day. This helps with consistency.
Analyzing changes is easy with organized photos. Compare photos side by side. Look for muscle growth and fat loss. Pay attention to small details. Notice changes in your arms, legs, and stomach. Use a mirror for a better view. Share your photos with a coach or friend. They can help you see progress you might miss. Regularly review your photos. This keeps you motivated to reach your goals.
Frequently Asked Questions
How To Make Before And After Gym Photos?
Take clear photos in good lighting. Wear the same clothes for both pictures. Stand in the same position. Use a plain background. Take one photo before the workout and another after.
How To Take Bodybuilding Progress Pictures?
To take bodybuilding progress pictures, use consistent lighting and background. Stand relaxed and flexed. Capture front, side, and back angles. Take photos at the same time each day. Wear the same clothing for accurate comparison.
How To Take Better Before And After Photos?
Take photos in the same location with consistent lighting. Use a tripod for stability. Wear similar clothing. Capture multiple angles.
How To Take Photos Of Bodybuilding?
To take bodybuilding photos, use good lighting, highlight muscle definition, and choose flattering angles. Maintain a clean background. Use a high-quality camera.
Conclusion
Capturing effective before and after photos can boost your bodybuilding progress. Follow the tips for consistency and clarity. Good lighting, proper angles, and regular updates are key. Document your journey accurately to see real improvements. Share your progress to motivate yourself and others in the fitness community.
I'm Khirul Alam, aka NILOY FITNESS, a devoted bodybuilder and fitness expert. I write about fitness, bodybuilding, and mental health at Hercules Bodybuilding to inspire and help people reach their fitness goals. I'm committed to making a positive impact in the fitness community.